


Fellow garden enthusiasts! The summer sun is blazing, crops are thriving, and our raised garden beds are buzzing with life. Before you dive into planting or tending your favorite veggies, let’s talk about a game-changer for your garden: composting. Summer’s heat and abundant scraps—think watermelon rinds and lawn clippings—are your ticket to transforming waste into nutrient-packed “garden gold.” This article dives into four composting methods tailored for raised garden beds, helping you supercharge your soil this season!

Summer: The Prime Season for Composting
Summer’s scorching temperatures are a compost pile’s best friend, speeding up decomposition and turning scraps into rich compost in weeks. Raised garden beds, with their compact design, make compost management a breeze, letting you mix nutrient-rich compost directly into the soil. From kitchen leftovers to garden trimmings, summer offers a bounty of materials to create garden gold. Let’s harness the heat and get composting!
Composting Basics: Building Your Garden Gold
Compost is nature’s fertilizer, delivering nutrients, improving drainage, and inviting beneficial microbes to your raised beds. The key is balancing “green” materials (nitrogen-rich, like veggie scraps or grass clippings) with “brown” materials (carbon-rich, like dry leaves or cardboard) at a 1:3 ratio. Summer’s abundant ingredients include:
· Green materials: Watermelon rinds, vegetable peels, fresh lawn clippings.
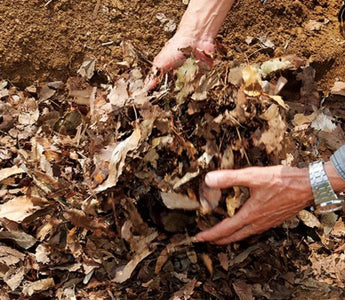
· Brown materials: Fallen leaves, dry straw, shredded cardboard.
Keep the right mix to avoid odors, and steer clear of meat or oily scraps to prevent pests.
Hot Composting
Hot composting thrives in summer’s heat, using high temperatures (120-150°F or 50-65°C) to rapidly break down materials. It’s perfect for raised bed gardeners needing quick results. Here’s how it works:
· Build the pile: In a large bin or open space near your raised bed, layer green and brown materials (10-15 cm per layer), aiming for a pile at least 3 feet wide and tall to trap heat.
· Turn regularly: Flip the pile weekly to add oxygen and ensure even decomposition.
· Monitor conditions: Keep it as moist as a wrung-out sponge and check temperatures with a compost thermometer.
Hot composting delivers rich compost in 4-6 weeks, ready to nourish your raised beds.
Tumbler Composting
Tumbler composting uses a rotating barrel to speed up decomposition, ideal for small-space raised bed gardens. The tumbling action mixes materials and boosts oxygen flow. Steps include:
· Fill the tumbler: Load green and brown materials at a 1:3 ratio, filling to about two-thirds capacity.
· Spin daily: Rotate the tumbler 3-5 times daily to aerate the mix.
· Check moisture: Ensure materials stay damp, adding water or dry straw as needed.
Tumbler composting produces compost in 4-8 weeks, offering a low-effort option for busy gardeners.
Vermicomposting
Vermicomposting enlists red wiggler worms to transform scraps into nutrient-dense compost, perfect for small raised bed setups or indoor spaces. Worms work magic, producing “black gold” and liquid “worm tea” for fertilizing. Here’s how:
· Set up a worm bin: Use a ventilated shallow box with moist bedding (shredded newspaper or coconut coir) and add red wigglers.
· Feed the worms: Add soft green materials like fruit peels or veggie scraps, avoiding acidic or greasy foods.
· Maintain conditions: Keep the bin moist (60-80% humidity) and store in a cool, shaded spot.
Vermicomposting takes 2-4 months, delivering rich compost for your raised beds.
Bokashi Composting
Bokashi composting ferments kitchen scraps (even meat!) in a sealed bucket, making it a great fit for raised bed gardeners with limited space. Microbes in bokashi bran drive the process. Steps include:
· Layer the bucket: Add scraps and sprinkle bokashi bran in thin layers in an airtight bucket.
· Ferment: Seal the bucket and let it ferment for 2-4 weeks.
· Bury in soil: Mix the fermented compost into your raised bed soil, where it fully breaks down in 10-14 days.
Bokashi is fast and efficient, ideal for handling summer’s abundant kitchen waste.
Incorporating Compost into Raised Garden Beds
Mature compost is dark brown, crumbly, and odor-free, resembling fertile soil. To use it in raised beds:
· Mix with soil: Blend compost with garden soil at a 1:4 ratio 2-3 weeks before planting.
· Top-dress crops: Spread compost around established plants as a slow-release fertilizer.
· Mulch for protection: Cover with wood chips or straw to retain moisture and regulate temperature.
Compost enhances drainage, boosts nutrients, and welcomes worms to your raised beds.
Avoid These Composting Pitfalls
Not all scraps belong in your compost. Steer clear of:
· Diseased plants: They can spread pathogens, harming your crops.
· Invasive weeds: Plants like bindweed may survive composting and compete with your plants.
· Carnivore manure: Stick to herbivore manure (e.g., rabbit or chicken) to avoid harmful bacteria.
To prevent odors or pests, always cover green materials with browns and maintain the proper green-to-brown ratio.
Conclusion
Summer’s heat is your secret weapon for creating garden gold in raised beds! With hot composting, tumbler composting, vermicomposting, and bokashi composting, you can turn summer scraps into nutrient-rich treasure. Pick the method that fits your space and needs, and watch your raised beds thrive.


